Prestashop connection
The Smart way of OrderPicking
Pick and pack with less mistakes and efficient routes.
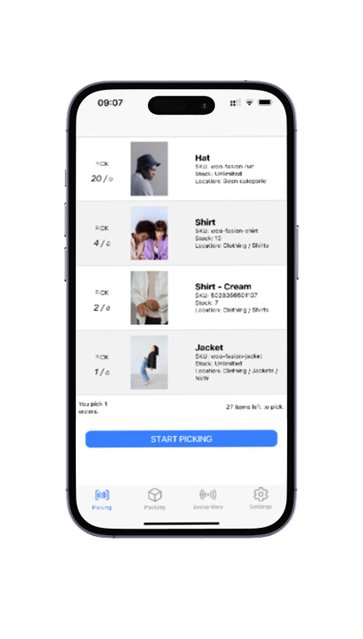
Easily process your Prestashop orders in the Order Picking App online software. Easily collect the products through stock locations, check the products using a barcode scanner or the phone camera (optional) and pick the right products quickly and without errors.
All orders and associated history can always be found in the clear order overview in Prestashop. This way, customer service can easily see the status of an order.
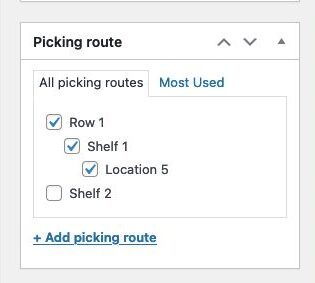
Use the custom picking route that can be set per product to make the walking route as efficient as possible. The app can be configured completely according to your wishes in the My Account.
FAQ Prestashop Orderpicking App
The Orderpicking App requires at least Android version 15 (Android 5.0 Lollipop) or higher.
This is not our own decision, but a requirement set by the Google Play Store. Google does not allow new apps or updates to be published for Android versions lower than 15. As a result, we are unable to make the app available for older devices.
We would love to support older versions, but publishing through the Play Store is technically not possible due to Google’s policies on security and compatibility.
Recommendation:
Please ensure your device runs Android 5.0 or newer. Most smartphones and tablets from the last few years already meet this requirement.
How to Set Up Batch Picking
1. Open App Settings Go to App Settings via My Account on orderpickingapp.com or in the WordPress plugin. Under the Picking Type setting, switch from Single Order Picking to Batch Picking. Save the settings and restart the app on your device.
2. Select a Picker and Orders In the app, select the picker who will be processing the orders. Optionally, enable the setting to manually choose which orders are included in the batch.
3. Start Picking
* If no orders have been claimed by the picker, the app will automatically load the oldest 5 open orders.
* Alternatively, you can select specific orders by scanning the order number or manually entering it.
You’ll now see the total number of orders in your batch. Tap Start Picking to begin the process.
Batch Picking
We’ll group orders into batches of 5 per picking run. Each bin on the cart should be labeled A, B, C, D, and E. When starting a picking run, you’ll receive a run number that applies to the entire cart (e.g. Run 31).
During picking, the first product may belong to multiple orders. In that case, the app will tell you which bin letter(s) to place the product in and how many units to pick for each.
Once all items have been picked, proceed to the packing screen. Here, you’ll see each order listed by its run number + bin letter (e.g. 31A, 31B, etc.). This allows you to match the picked items to the correct customer and prepare them for shipping.
o use the order picking app optimally with an external Bluetooth scanner and a keyboard, we recommend enabling the HiD Keyboard function on your scanner.
What does the HiD Keyboard function do?
This feature allows you to use both your keyboard and Bluetooth scanner simultaneously as input devices.
It’s ideal for situations where you need to alternate between entering data via the keyboard and scanning with the Bluetooth scanner.
What if my scanner doesn’t have a HiD Keyboard function?
If your scanner doesn’t support this function, you can only use one input device at a time.
This means you can either have the keyboard or the scanner active—but not both simultaneously.
Tip: Check your Bluetooth scanner’s manual to see how to enable the HiD Keyboard function.
It’s often easy to activate through a specific settings mode or by scanning a configuration code.
With the right settings, you can get the most out of your order picking app!
To obtain an efficient picking route, we have made it possible to arrange the products to be picked according to certain values.
There is an option to arrange the products by:
– Category
– SKU
– Barcode
– Custom picking location
By default, the picking route is set based on the webshop categories. These can be dragged in order in the plugin > Picking route. In addition, the SKU or Barcode can be set ascending and descending.
For Woocommerce, you have the option to create your own location hierarchy for the products (maximum 3 levels), just as the categories have been created.
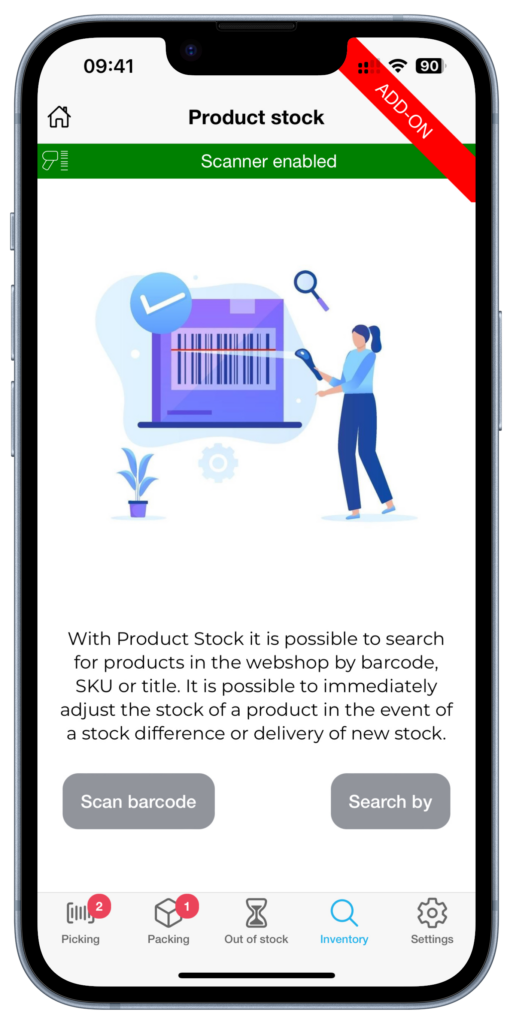
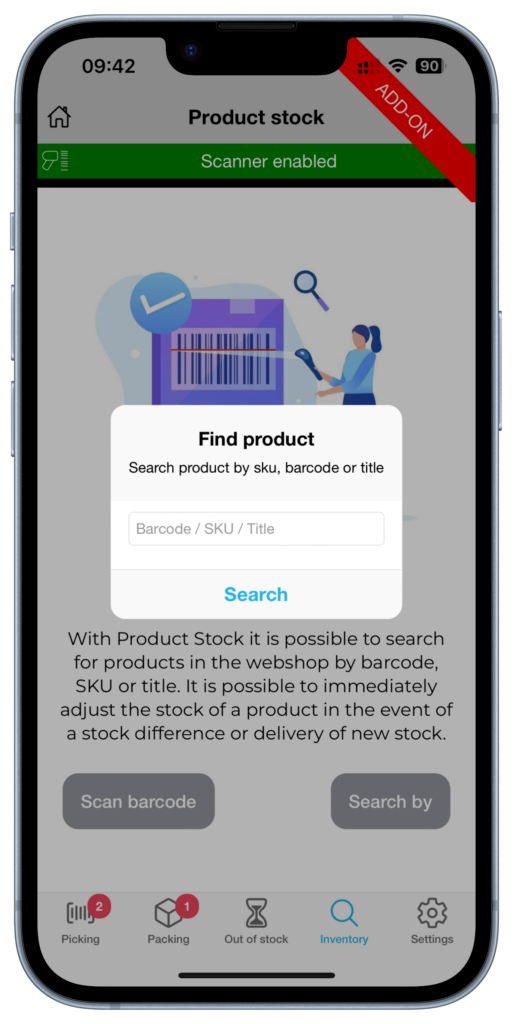
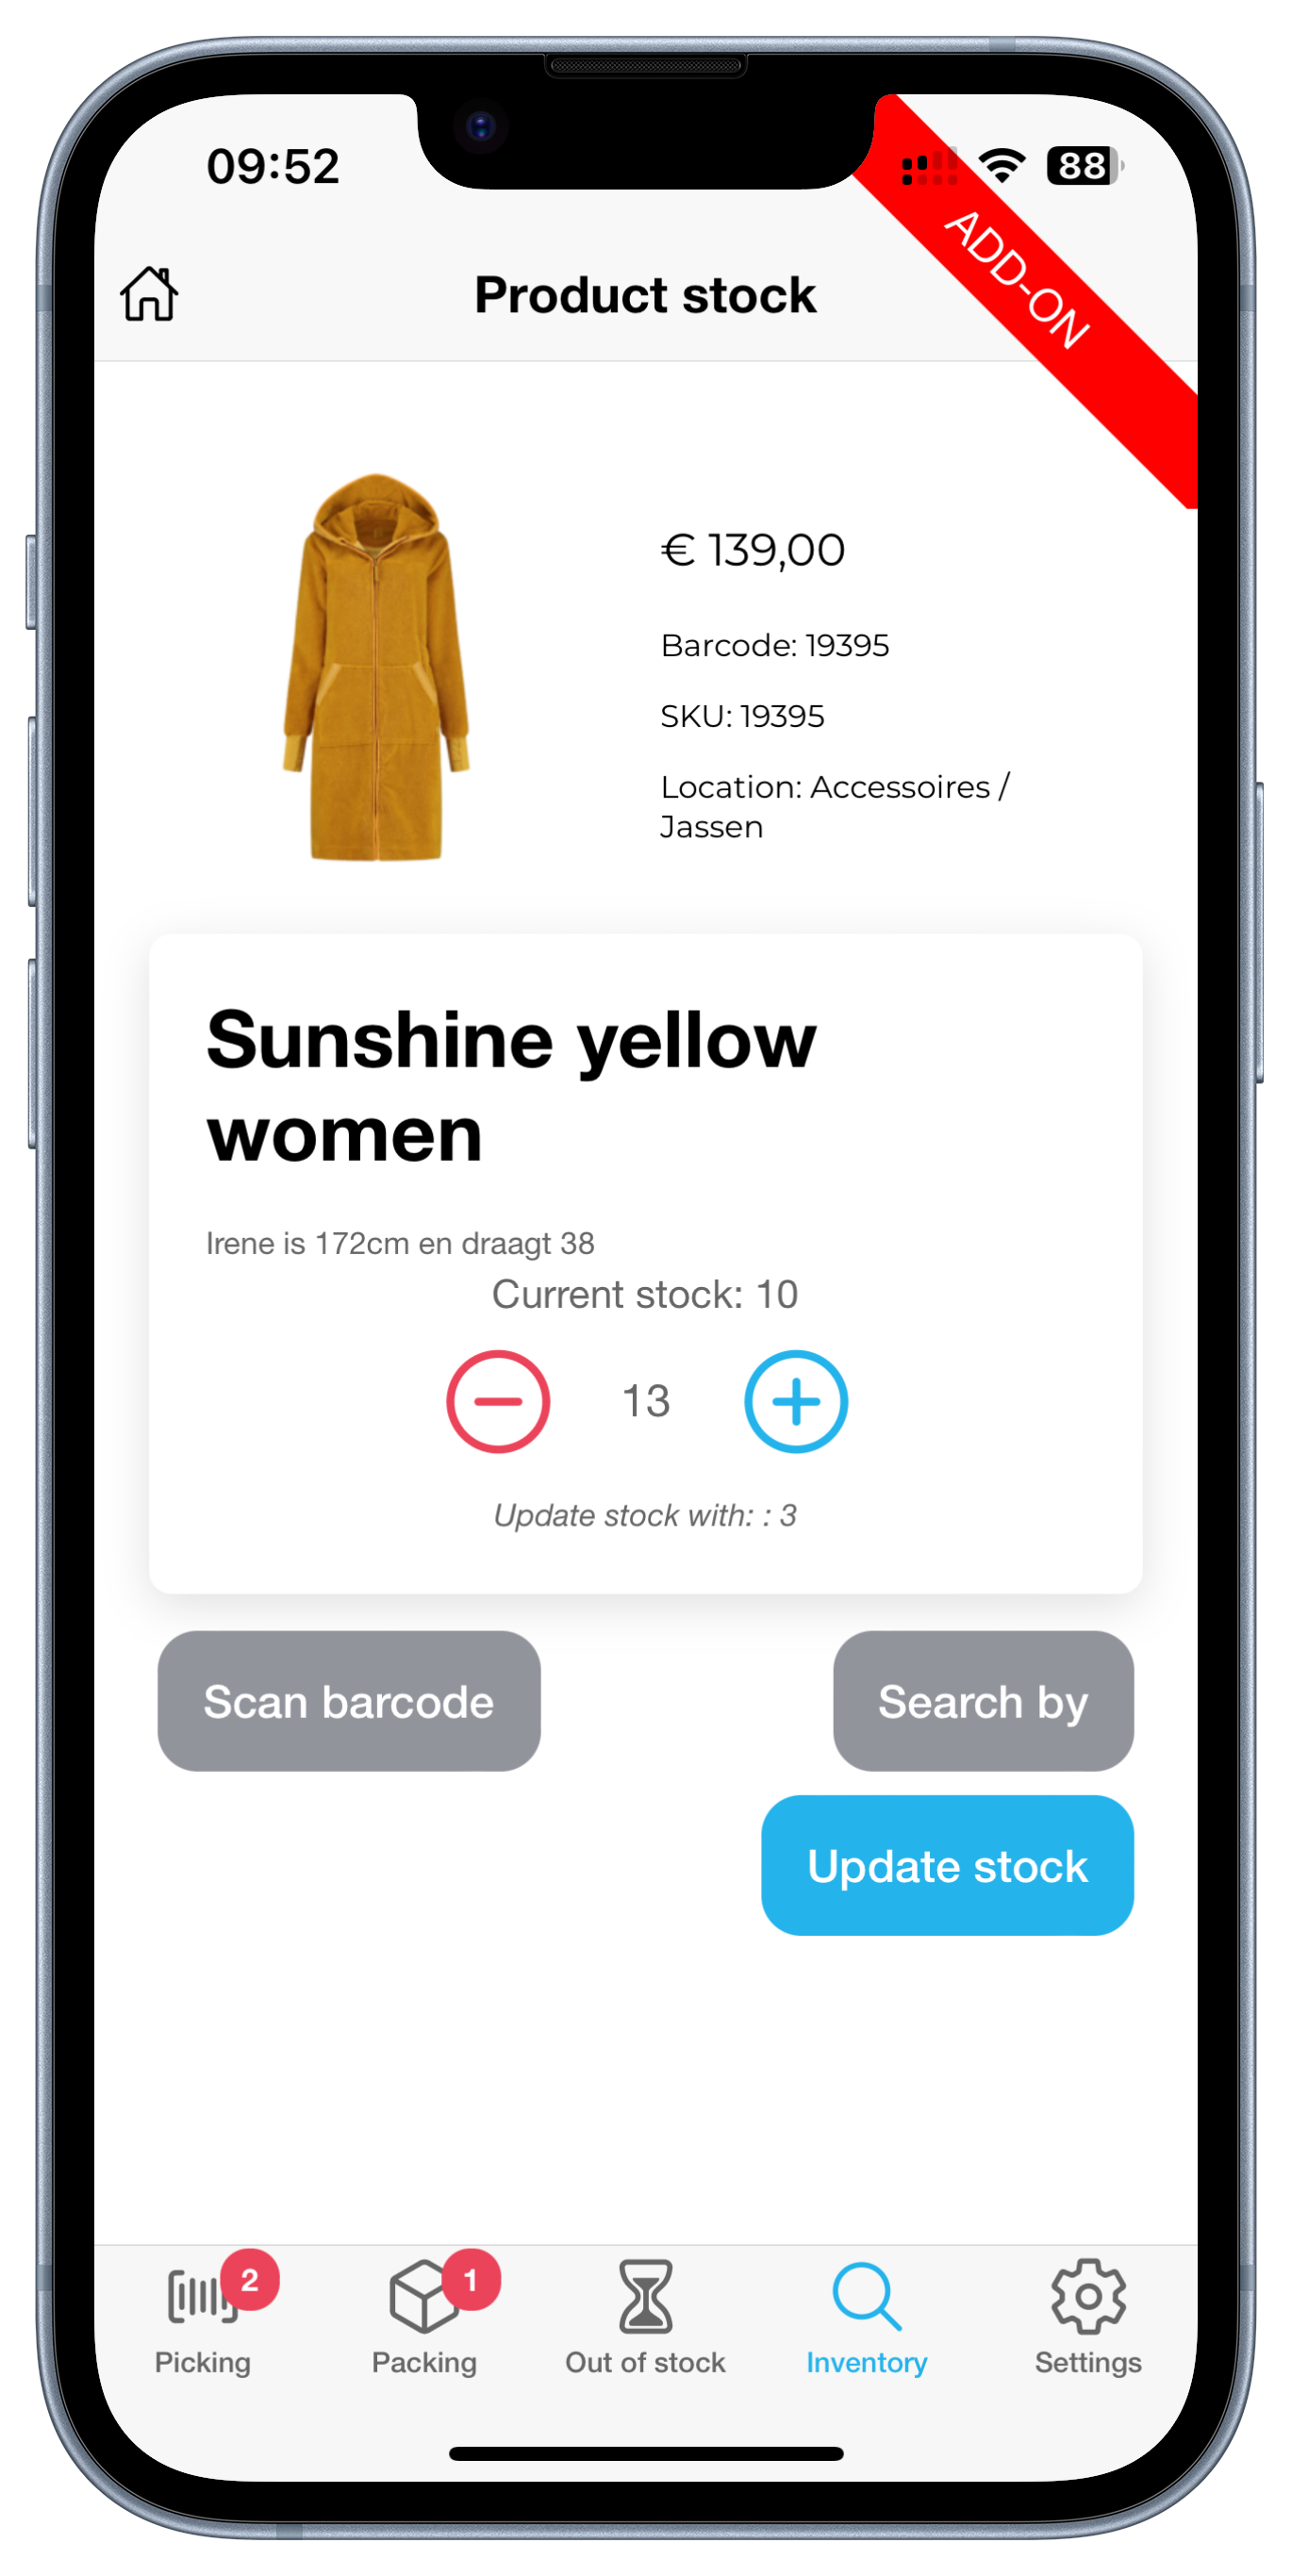
When you are order picking, you are already walking through the warehouse or the store. This is the perfect time to occasionally check the stock of a product. With the Inventory add-on we offer the option to scan the barcode or enter the sku/barcode (searching by product title is also possible for Woocommerce customers). We then retrieve the current stock of a product and this can be adjusted if necessary.
Inventory differences can be resolved during order picking. For example, consider products on a roll that are cut off during collection or to book new stock during a delivery.

Every shop has it’s own way of collecting orders. Some want to pick per order and others have multiple totes on a trolley. This is why we have the setting of the Order amount to pick at once.


When picking a single order you will start with the complete order list of open orders in the app. Here you can choose the order to pick.
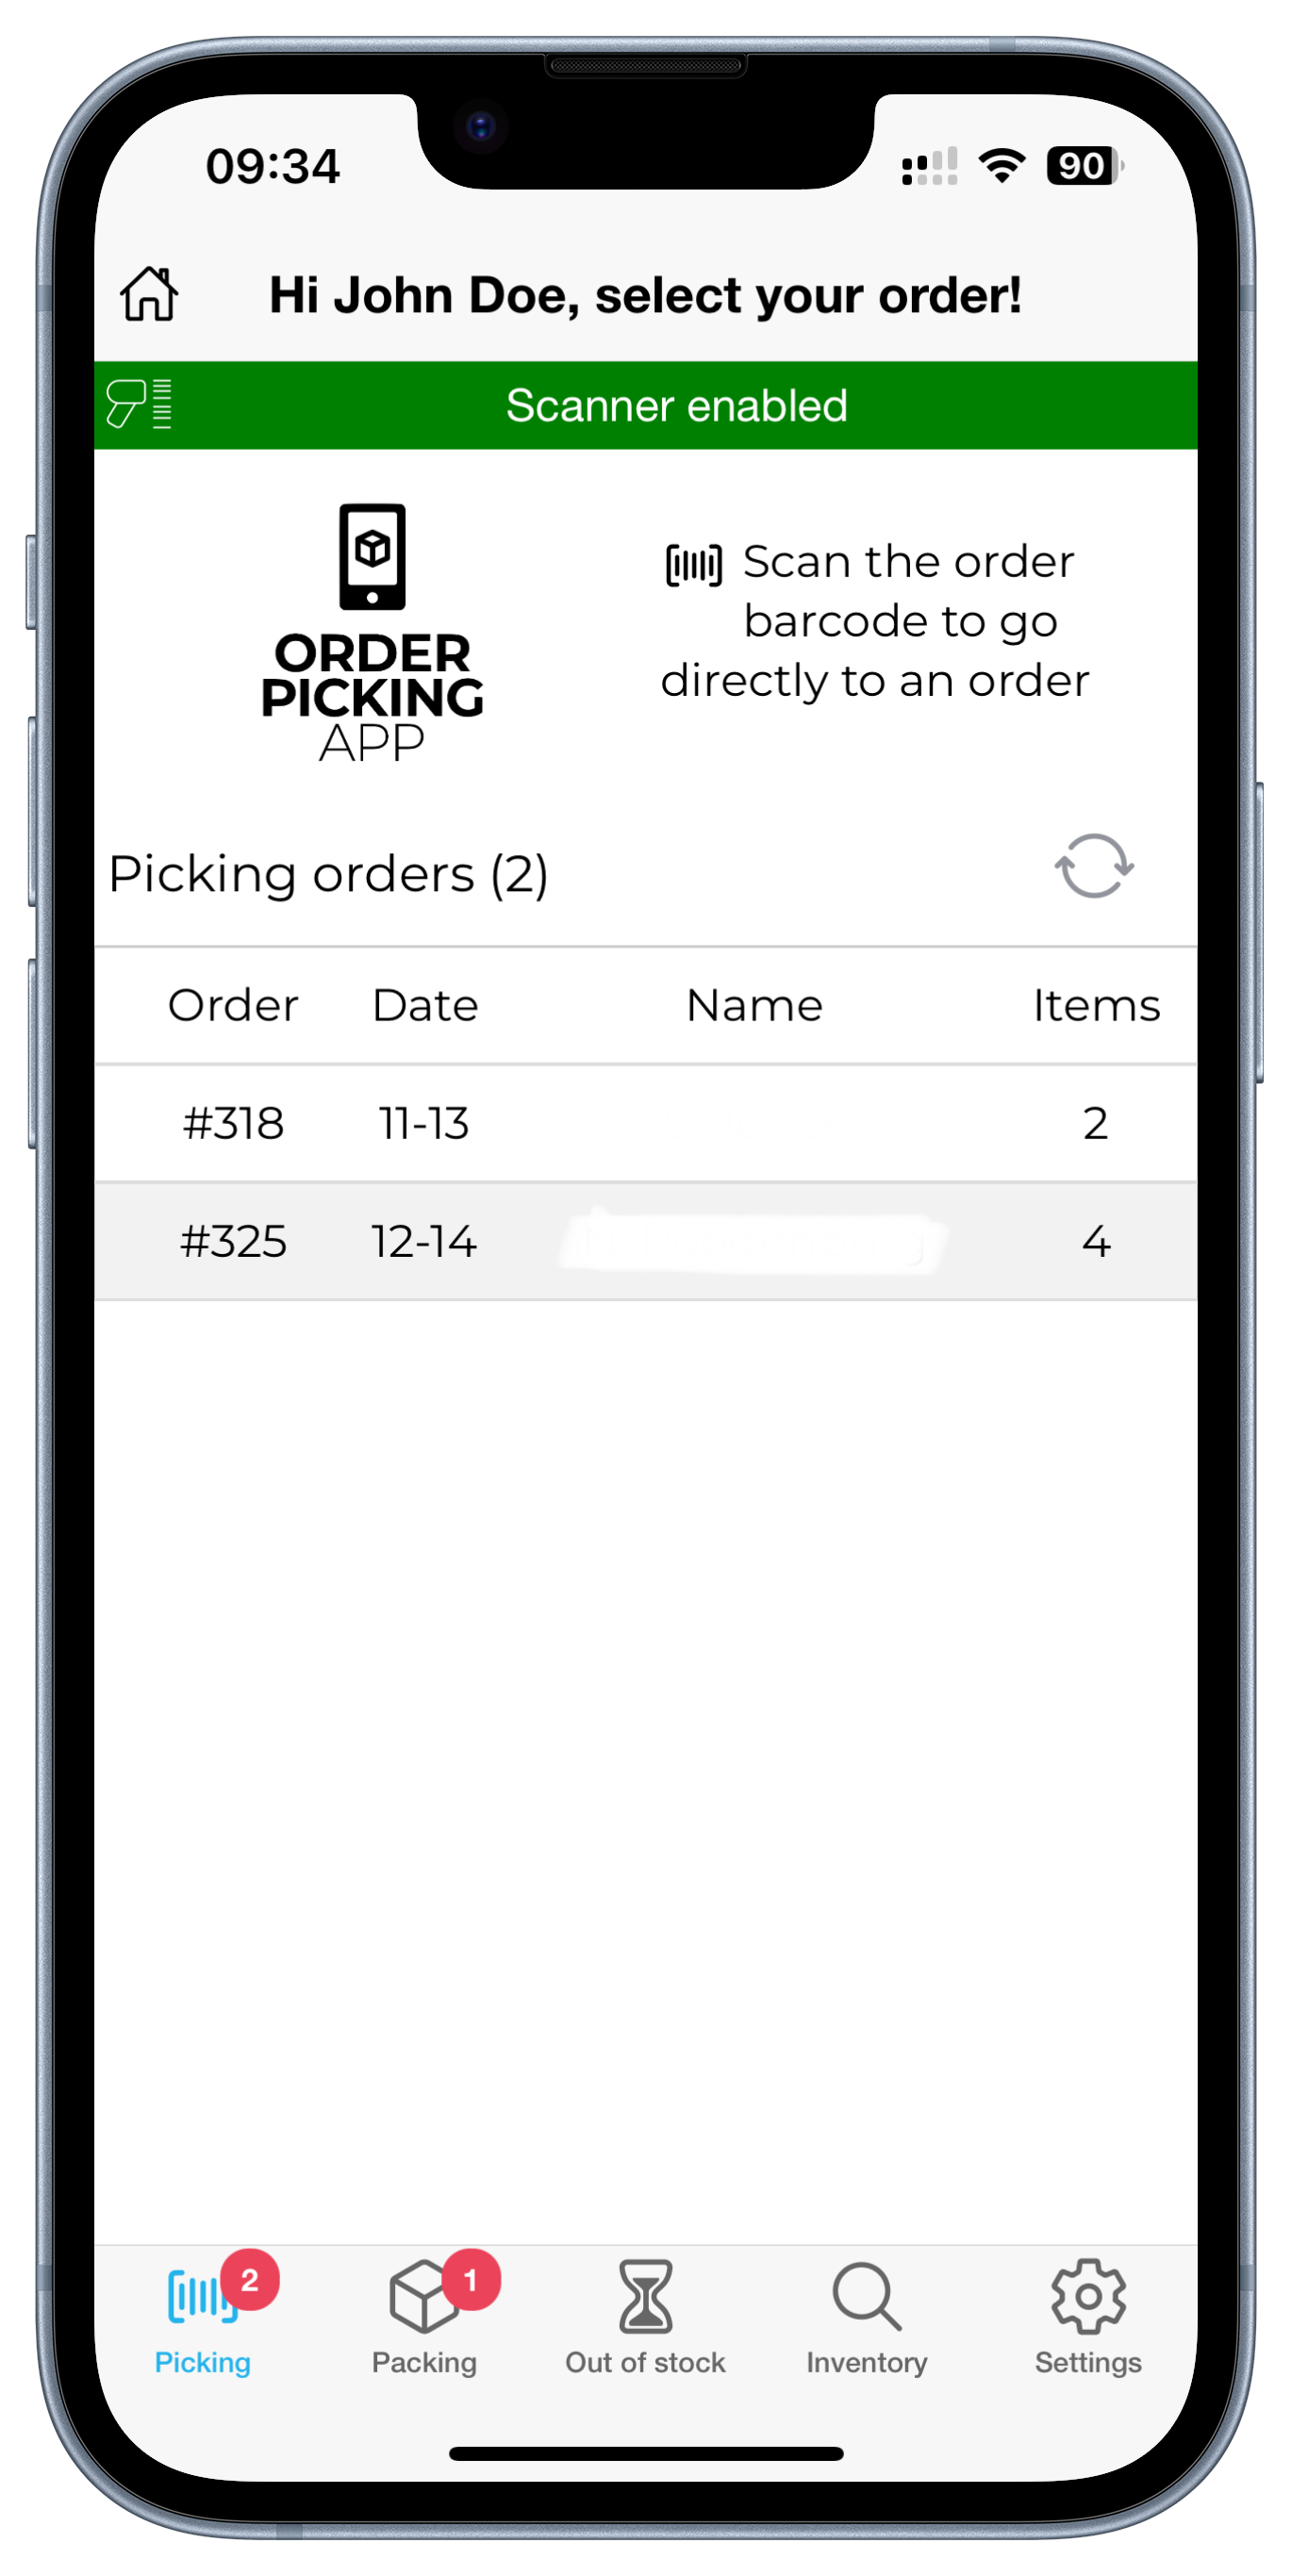
Single order picking
Batch picking
When selecting something other than single order we change the layout in the app a bit. If you have the option of 5 orders at once, we combine 5 orders in 1 picking-run. Each order will get a letter starting from A and a number (the batchnumber). These numbers will stick to the order true the whole process.
When batchpicking we will combine the orders so you will only stop at a product once (for multiple orders).
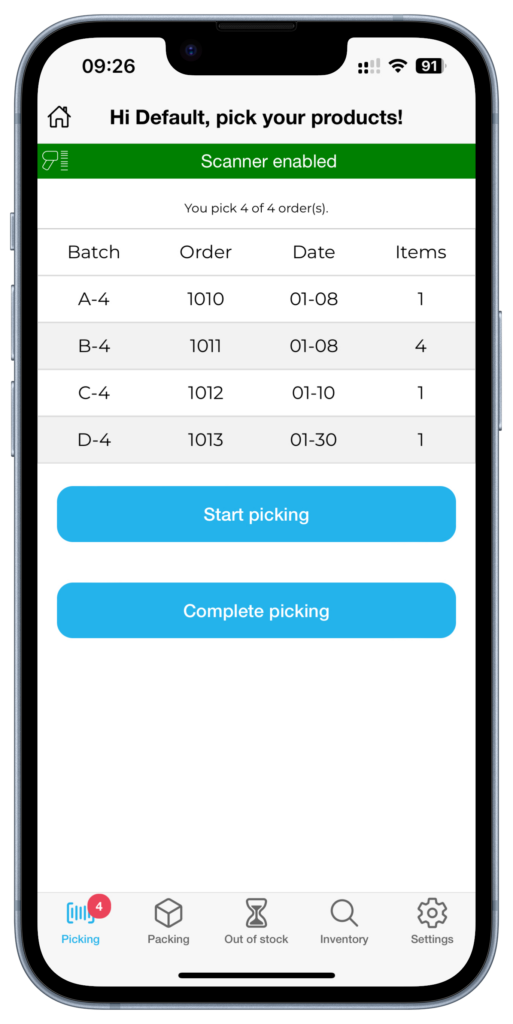
Batch picking orders

Batchpicking productscreen
Step 1
Go to https://www.orderpickingapp.com and choose Plans & Pricing (or the green button at the top right).
Step 2
Enter all data, choose the desired platform of the webshop (Prestashop)
Step 3
After completing the order you will receive an email with the user details and the link of the account to be able to log in immediately.
Step 4 PRESTASHOP
Check if this in activate: mod_auth_basic on your hosting or server
Go in the PrestaShop back office, open the “Web service” page under the “Advanced Parameters” menu, and then choose “Yes” for the “Enable PrestaShop Webservice” option. In order to have access to the API you need to create an access key, this will allow you to finely tune the permissions you give to the different data of your shop. You will use this key later in each call to the API. Open the “Webservice” page under the “Advanced Parameters” menu, and then click the “Add new webservice key” button to access the account configuration section.
GET Permissions
1. orders
2. order_states
3. categories
4. products
5. stocks
6. carriers
7. stock_availables
8. customers
PUT
1. orders
2. stock_availables
Step 5 MY ACCOUNT
- Copy the created WEBSERVICE KEY and paste this in the MY ACCOUNT of the orderpickingapp.com settings page. Then Save
- Upload a company logo.
- Also choose here whether you pick per order or per x number of products. Leave your Picking Type empty and the app will show all orders/products to pick.
Step 6 APP INSTALL
Download the Orderpicking App on your phone. Go to the Apple App Store or the Google Play Store and search for Order Picking App
- Go to the Settings tab in My Account. Here is the API Key (Barcode + numbers).
- Open the app on the phone and press Scan API key. The phone’s camera opens.
- Scan the barcode and save it in the App. If all goes well, everything is now connected!