New · Shipping labels
Print shipping labels right after packing
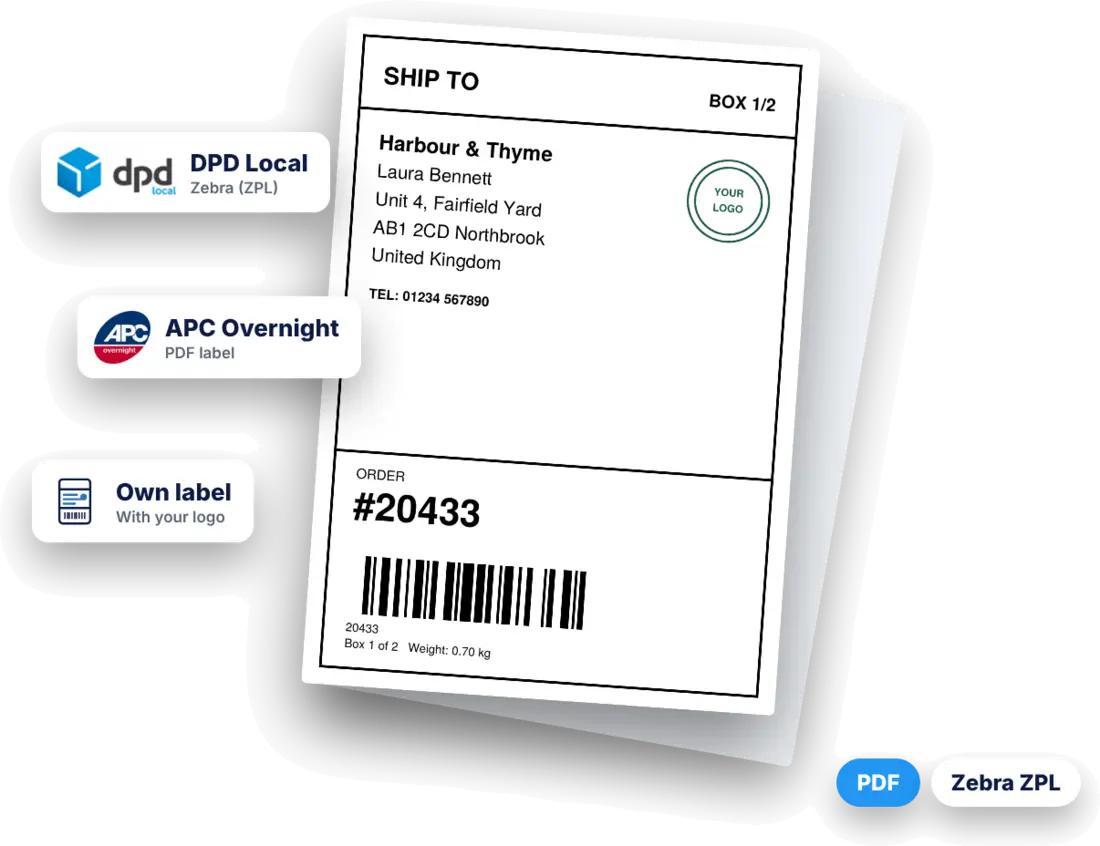
Finish an order in Desktop Packing and print the shipping label straight away: with DPD Local, APC Overnight, or as your own label with your logo for local delivery and pickup.
- Live now: DPD Local, APC Overnight and your own label
- Print as PDF on a label printer, or as ZPL on a Zebra printer
- Part of the standard package, no separate add-on
How to print a shipping label in Desktop Packing
The label step comes right after you pack an order. Four steps, and you can skip it whenever you want.
Step 1
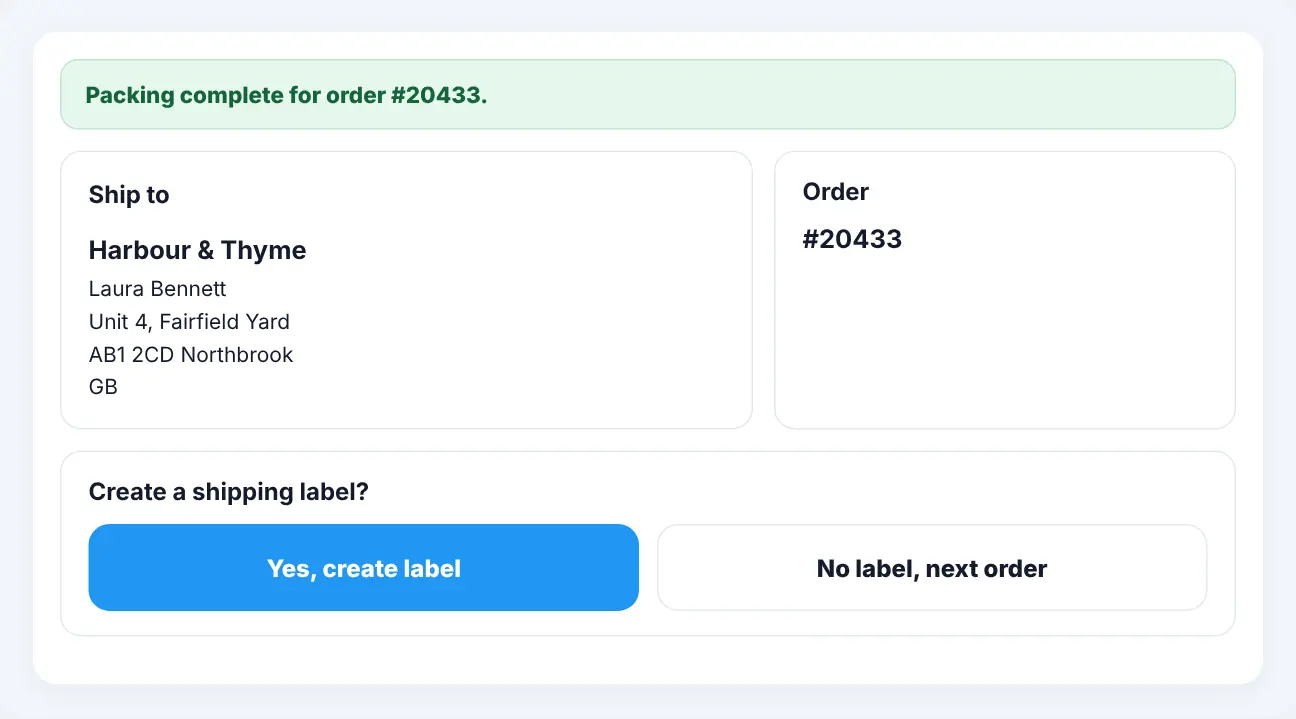
Finish packing, then choose: label or not
Every product is checked at the packing table. Then the app shows the shipping address and asks whether you want a label for this order.
- Address straight from the order
- Skip the label with one click
Step 2
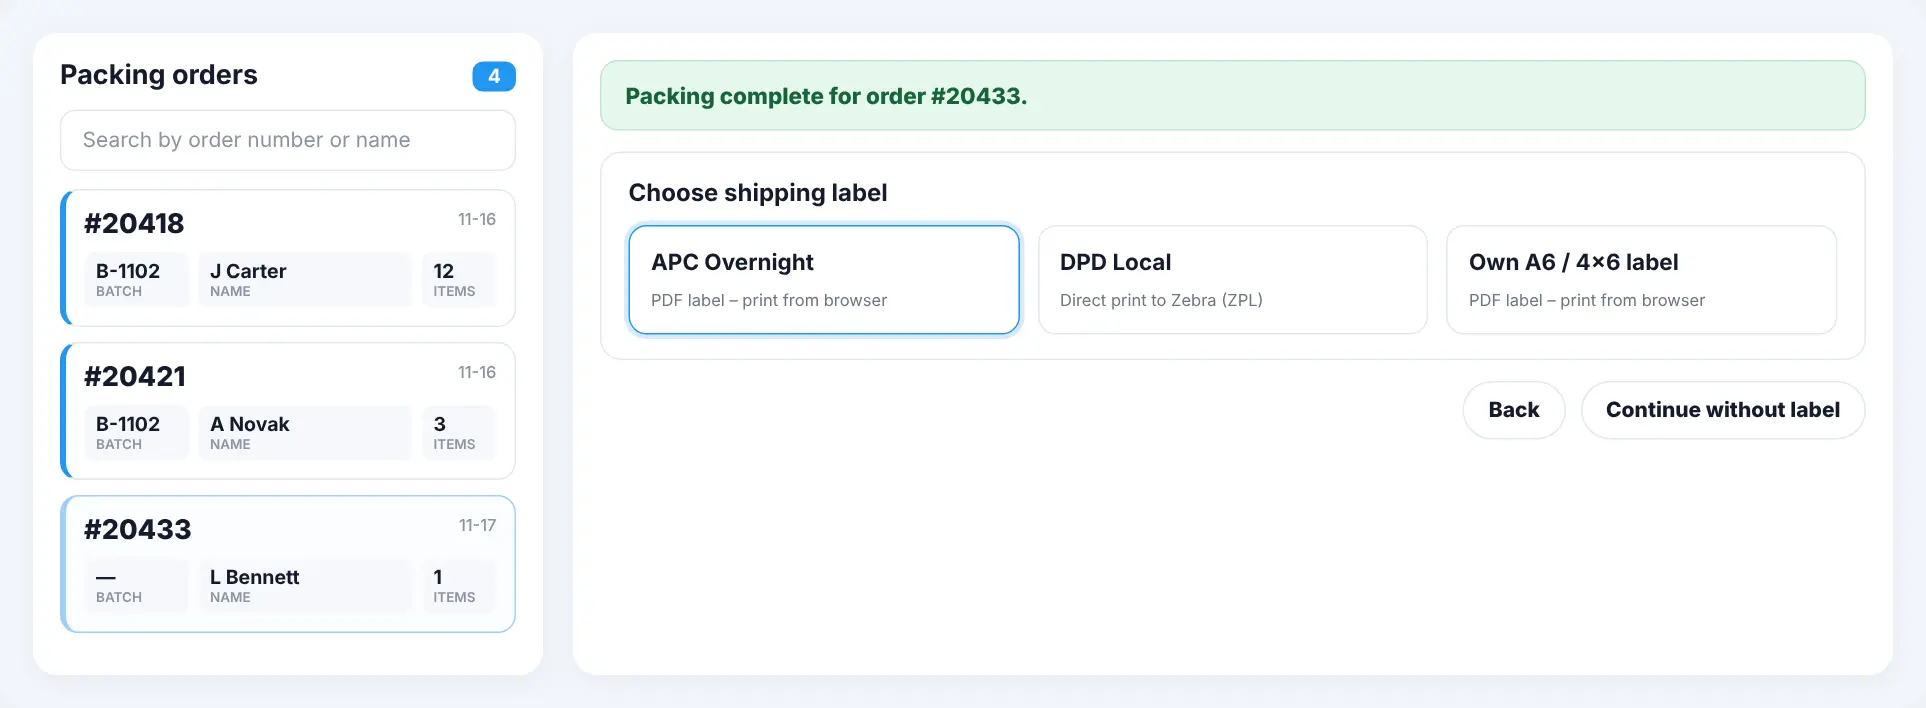
Choose the carrier or your own label
All carriers you connected are shown side by side, together with your own label. Pick the one for this order.
- DPD Local, APC Overnight and own label
- Connect several carriers
Step 3
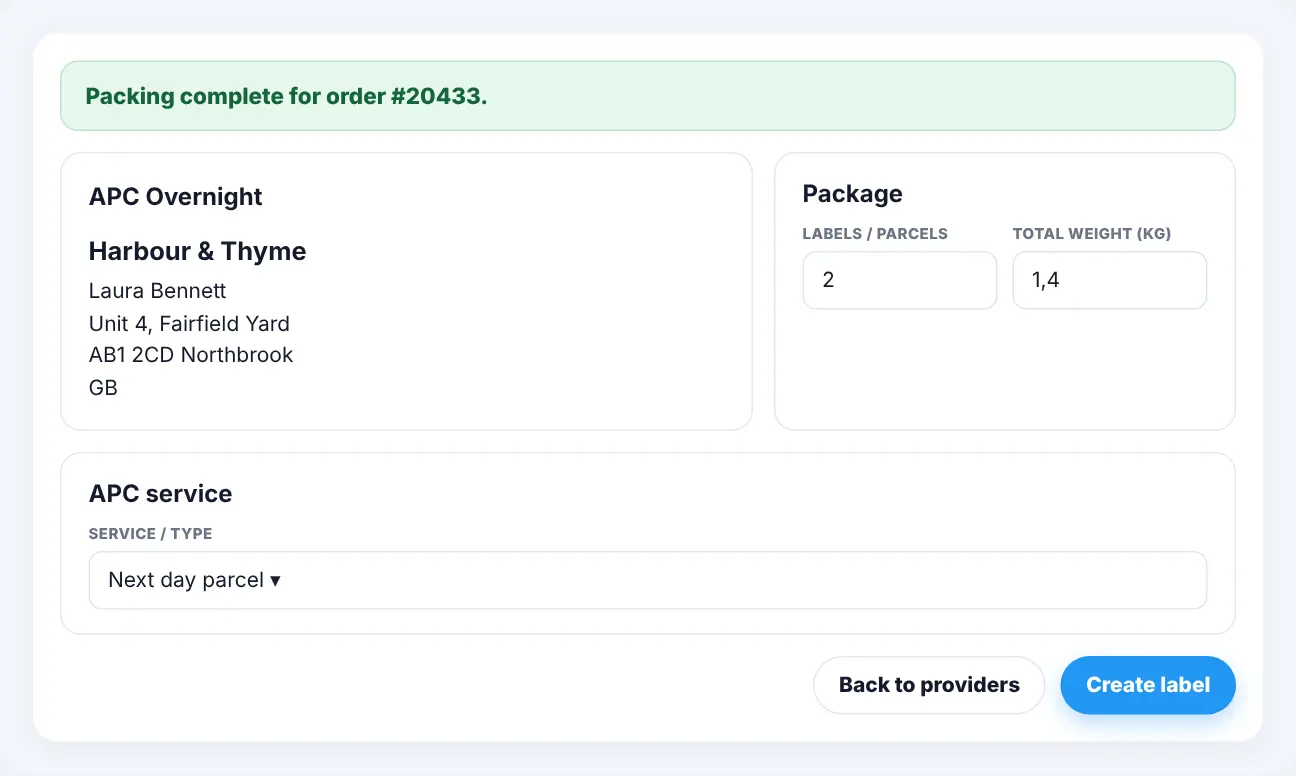
Set parcels, weight and service
Set how many parcels go out, the total weight and the carrier service, such as next day. You get one label per parcel.
- Name and address filled in
- One label per parcel
Step 4
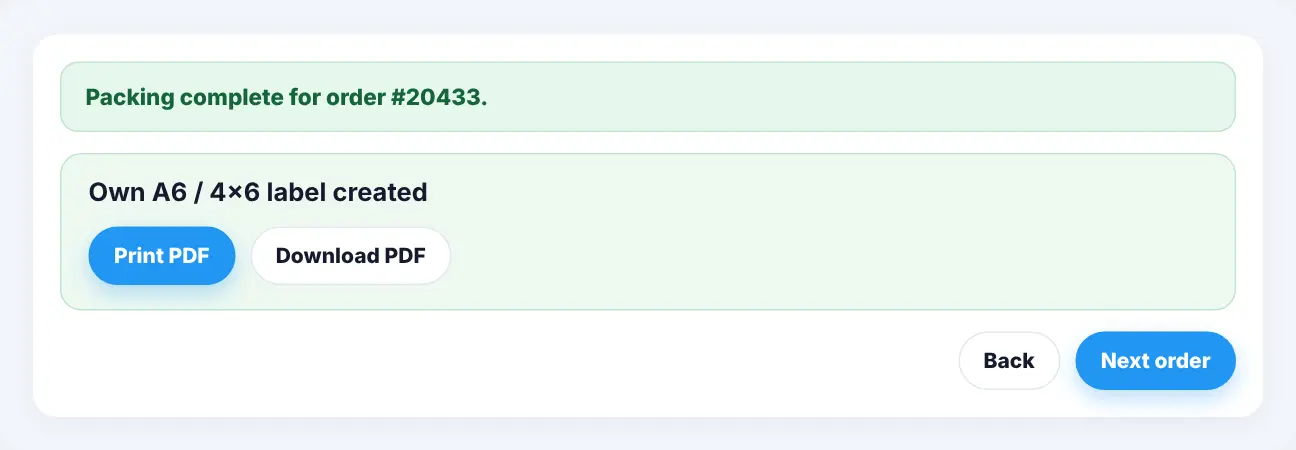
Print the label and pack the next order
Print the PDF on your label printer, download it, or send a ZPL label straight to your Zebra printer. Then pack the next order.
- PDF for any label printer
- ZPL for Zebra printers
Own label
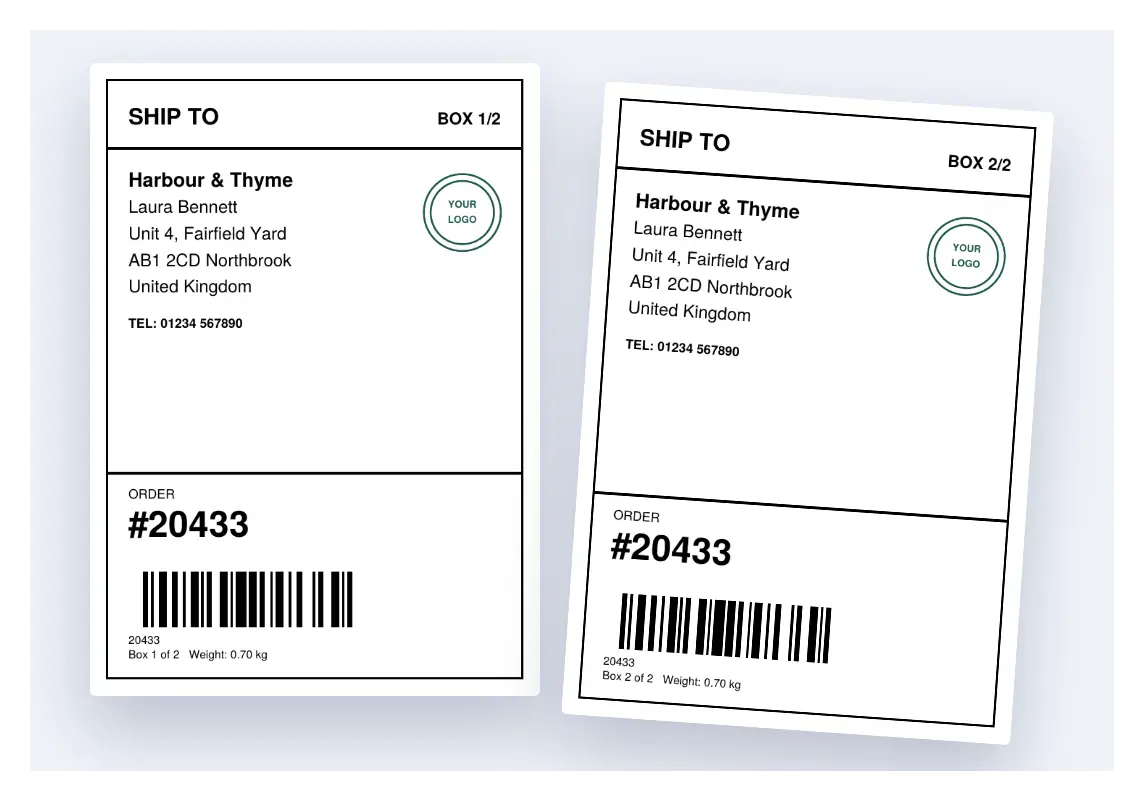
Print your own shipping label, with your logo
No carrier needed. Print an A6 / 4×6 label with the customer’s name and address, the order number as a barcode and your own logo. Handy when you deliver yourself, or when customers pick up their order.
- You deliver yourself: clear labels for your own rounds
- Pickup: find the right parcel by name or order number
- More boxes: Box 1 of 2, Box 2 of 2, with weight
Shipping carriers you can use today
Connect your own account with each carrier you use; you need your own contract with the carrier. You can connect several carriers and choose per order.
-
Live

DPD Local United Kingdom
- Direct print to a Zebra printer (ZPL)
- Parcels, weight and service per order
- On your own DPD Local account
-
Live
APC Overnight United Kingdom
- PDF label, print from the browser
- Parcels, weight and service per order
- On your own APC account
-
Live

Own label Any country
- A6 / 4×6 label with your logo
- Address, order number and barcode
- For own delivery and pickup
Need another carrier? Request it.
Click a carrier to send us an activation request. Every request helps us decide which connection to build next.
-
 Royal Mail
United Kingdom
Request activation
-
 Evri
United Kingdom
Request activation
-
 DPD
5 countries
Request activation
-
 Parcelforce
United Kingdom
Request activation
-
 PostNL
Netherlands, Belgium
Request activation
-
 DHL
5 countries
Request activation
-
 UPS
7 countries
Request activation
-
 FedEx
7 countries
Request activation
-
 GLS
6 countries
Request activation
-
 InPost
United Kingdom, Spain, Italy
Request activation
-
 Mondial Relay
Netherlands, Belgium, France
Request activation
-
 Trunkrs
Netherlands
Request activation
-
 Budbee
Netherlands, Belgium
Request activation
-
 bpost
Belgium
Request activation
-
 Colis Privé
Belgium, France
Request activation
-
 Hermes
Germany
Request activation
-
 Deutsche Post
Germany
Request activation
-
 Chronopost
France
Request activation
-
 Colissimo
France
Request activation
-
 Correos
Spain
Request activation
-
 Correos Express
Spain
Request activation
-
 CTT Express
Spain
Request activation
-
 SEUR
Spain
Request activation
-
 MRW
Spain
Request activation
-
 Poste Italiane
Italy
Request activation
-
 BRT
Italy
Request activation
-
 TNT
Italy
Request activation
-
 DHL Express
International
Request activation
-
 Amazon Shipping
4 countries
Request activation
-
 Asendia
International
Request activation
-
 Landmark Global
International
Request activation
-
 Spring GDS
International
Request activation
-
 PostNord
International
Request activation
- Not in the list? Any country Suggest a carrier
Carrier names and logos belong to their owners. A request is not a promise that a connection will be built.
Shipping labels at a glance
What you need and how it works.
- Where
- In Desktop Packing, right after an order is packed. Not (yet) in the mobile app.
- Platforms
- WooCommerce now. Shopify, BigCommerce, Wix and the other integrations are in development.
- Carriers
- DPD Local and APC Overnight, plus your own label. You can connect several carriers.
- Carrier contract
- You need your own contract with the carrier. The label is created on your own account.
- Printers
- PDF labels for any label printer, printed from the browser. ZPL labels for Zebra printers.
- Label size
- A6 / 4×6 inch.
- Parcels
- Set the number of parcels and the total weight per order: one label per parcel.
- Price
- Part of the standard package.
WooCommerce first, more integrations in development
Shipping labels work with WooCommerce today. The other integrations are in development. Tell us which one you use and we’ll let you know when it’s ready.
-
 WooCommerce
Available now
-
 Shopify
In development
-
 BigCommerce
In development
-
 Wix
In development
- Other integrations In development
Set up
Set up shipping labels (WooCommerce)
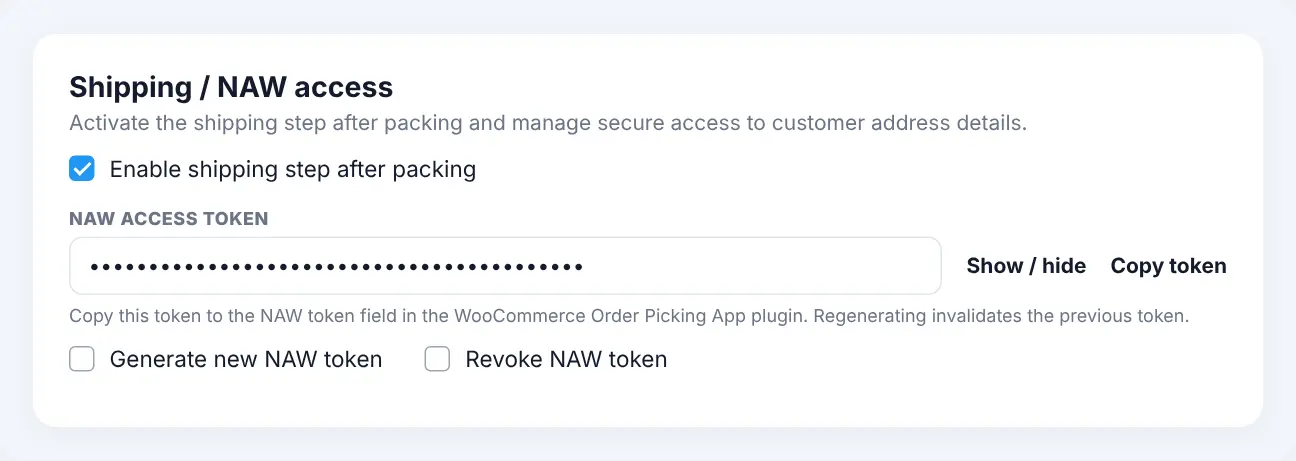
In My Account, turn on the shipping step after packing. Copy the NAW access token into the Orderpicking App plugin in WooCommerce: the app only reads name and address details with this token. Then connect your carrier account, or upload your logo for the own label.
- Turn the step on or off at any time
- New token? The old one stops working straight away
- Revoke access whenever you want
Frequently asked questions
Do I need my own contract with the carrier?
Yes. You connect your own account with the carrier, so you ship on your own rates and terms. The own label needs no carrier at all.
Can I connect more than one carrier?
Yes. Connect as many carriers as you use and choose the right one for each order when the label step appears.
Which printers can I use?
Any label printer that prints PDF from the browser, and Zebra printers that work with ZPL files.
Does it work in the mobile app?
Not yet. Shipping labels work in Desktop Packing, right after you complete an order.
Which platforms are supported?
WooCommerce. The other integrations are in development. Send us a mail if you’d like to know when yours is ready.
What does it cost?
Shipping labels are part of the standard package. Your carrier charges for the shipments under your own contract.
Can I skip the label for an order?
Yes. Choose “No label, next order” and you go straight to the next order.
How do I request a carrier?
Click the carrier on this page. Your email opens with a request to support@orderpickingapp.nl. Add your shop URL and roughly how many parcels you send per day.
Pack, label, next order
Try Orderpicking App free for 30 days. The trial ends on its own.